NVIDIA Jetson AGX Thor
Install WendyOS on an NVIDIA Jetson AGX Thor over USB recovery
Jetson AGX Thor uses a dedicated USB recovery flash path. WendyOS flashes the Thor's QSPI and internal NVMe directly; no external drive is required.
WendyOS on Jetson is built on JetPack 7.2 (L4T R39.2.0). Apps can target JetPack 7.2 or later.
What You Need
- NVIDIA Jetson AGX Thor Developer Kit
- USB-C data cable for your MacBook or other development machine
- Supplied Thor power supply
- Wendy CLI installed on your development machine (install it)
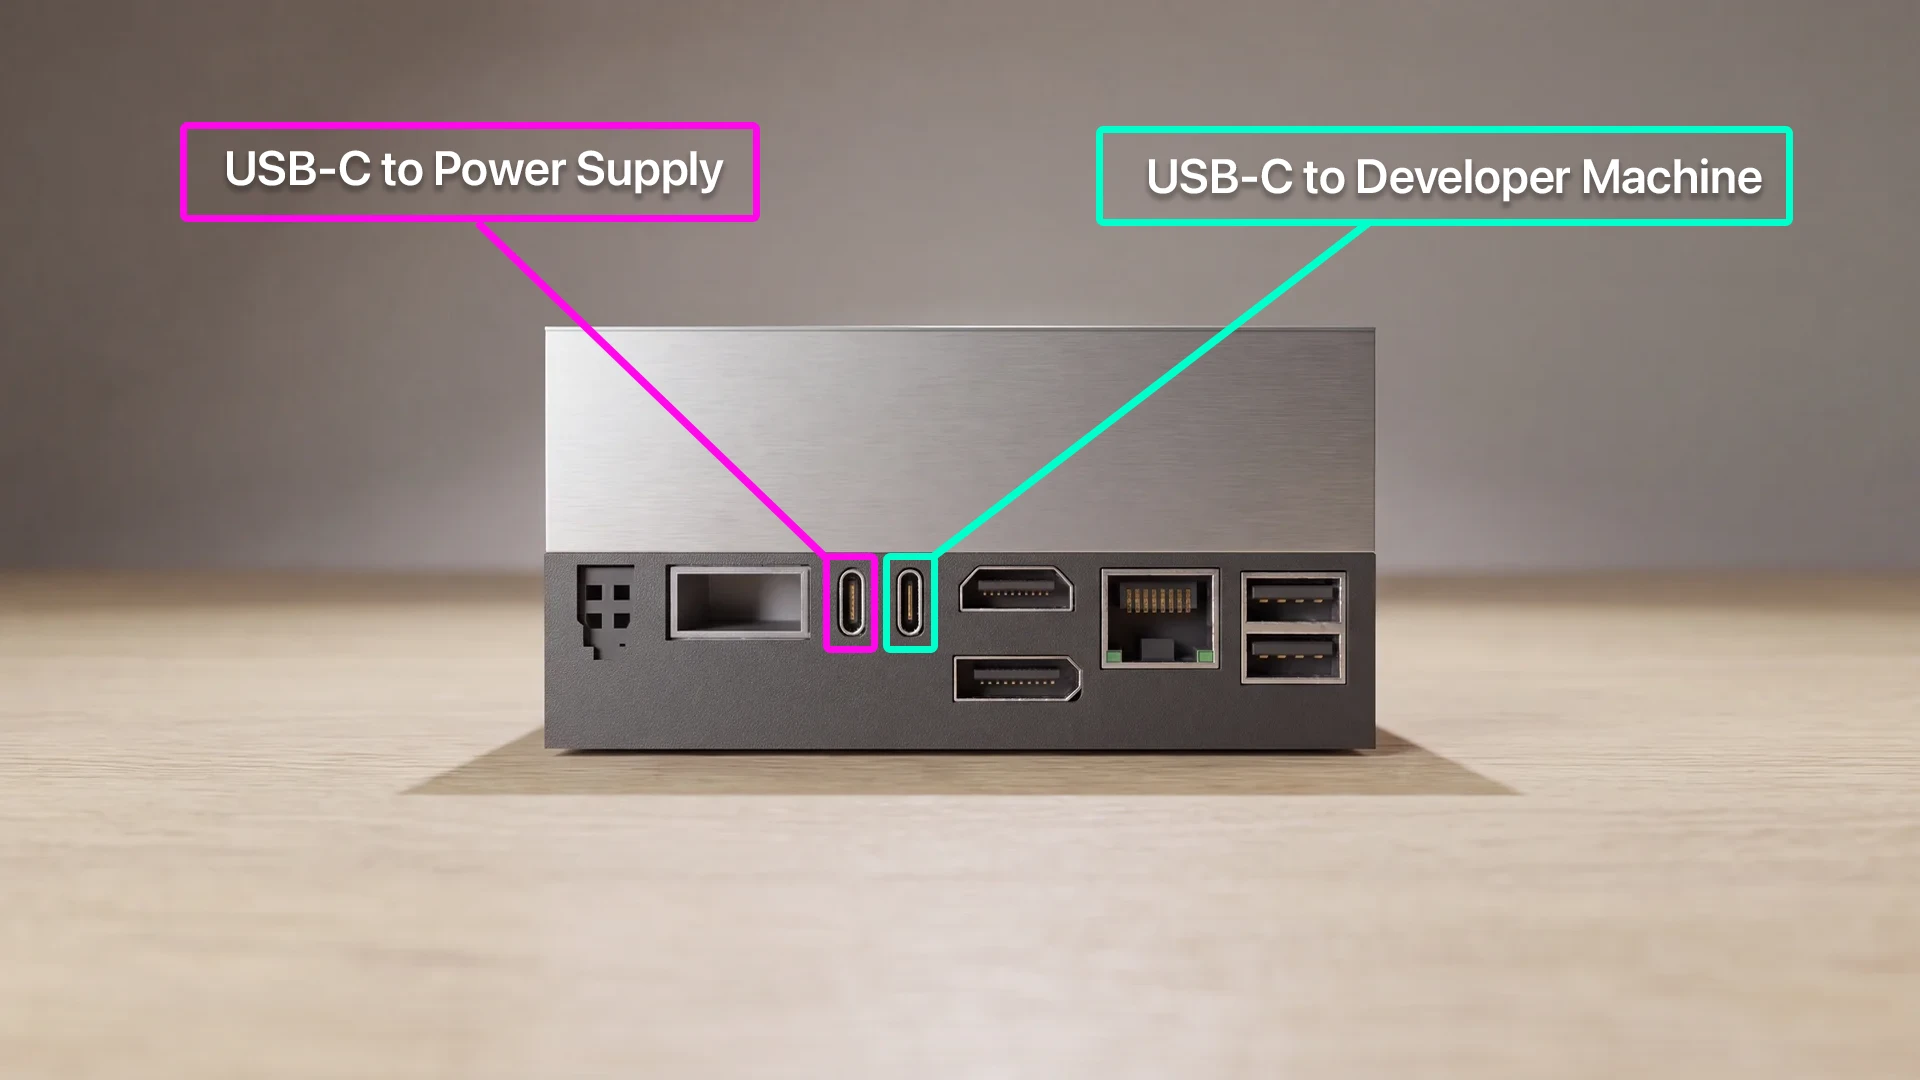
With the rear ports facing you: Power Cable connects on the left, and To Computer connects on the right, next to HDMI.
Installation Steps
Connect Your Computer
Start with the Thor powered off. Connect a data-capable USB-C cable to your MacBook or other development machine.
Turn the Thor so the back faces you; you should see all of the ports. Connect the other end to the right USB-C port, next to HDMI, labeled To Computer in the clip.
Connect Power
Plug the supplied power adapter into a power outlet, then connect its USB-C cable to the left USB-C port on the Thor, labeled Power Cable in the clip.
Enter Recovery Mode
Turn the Thor so the front faces you. Its three buttons, from left to right, are Power, Force Recovery, and Reset.
- Briefly press the left Power button to turn the Thor on.
- Press and hold the middle Force Recovery button.
- While holding it, briefly tap the right Reset button.
- Wait a moment, then release the middle Force Recovery button.
In the next step, confirm that the installer detects the Thor in USB recovery mode before flashing.
Install WendyOS
Run the installer from your terminal:
wendy installFollow the on-screen instructions. The CLI downloads a Thor flashpack, detects the Thor in USB recovery mode, and flashes QSPI plus its internal NVMe.
The recording uses sudo wendy os install. wendy install runs the same installer and requests elevated access when needed.
Boot WendyOS
After the CLI reports a successful flash, power-cycle the Thor out of recovery mode. It will boot WendyOS from internal storage; leave the data-capable USB-C cable connected to your computer.
Discover Your Device
Wait 1-2 minutes for WendyOS to boot, then run:
wendy discover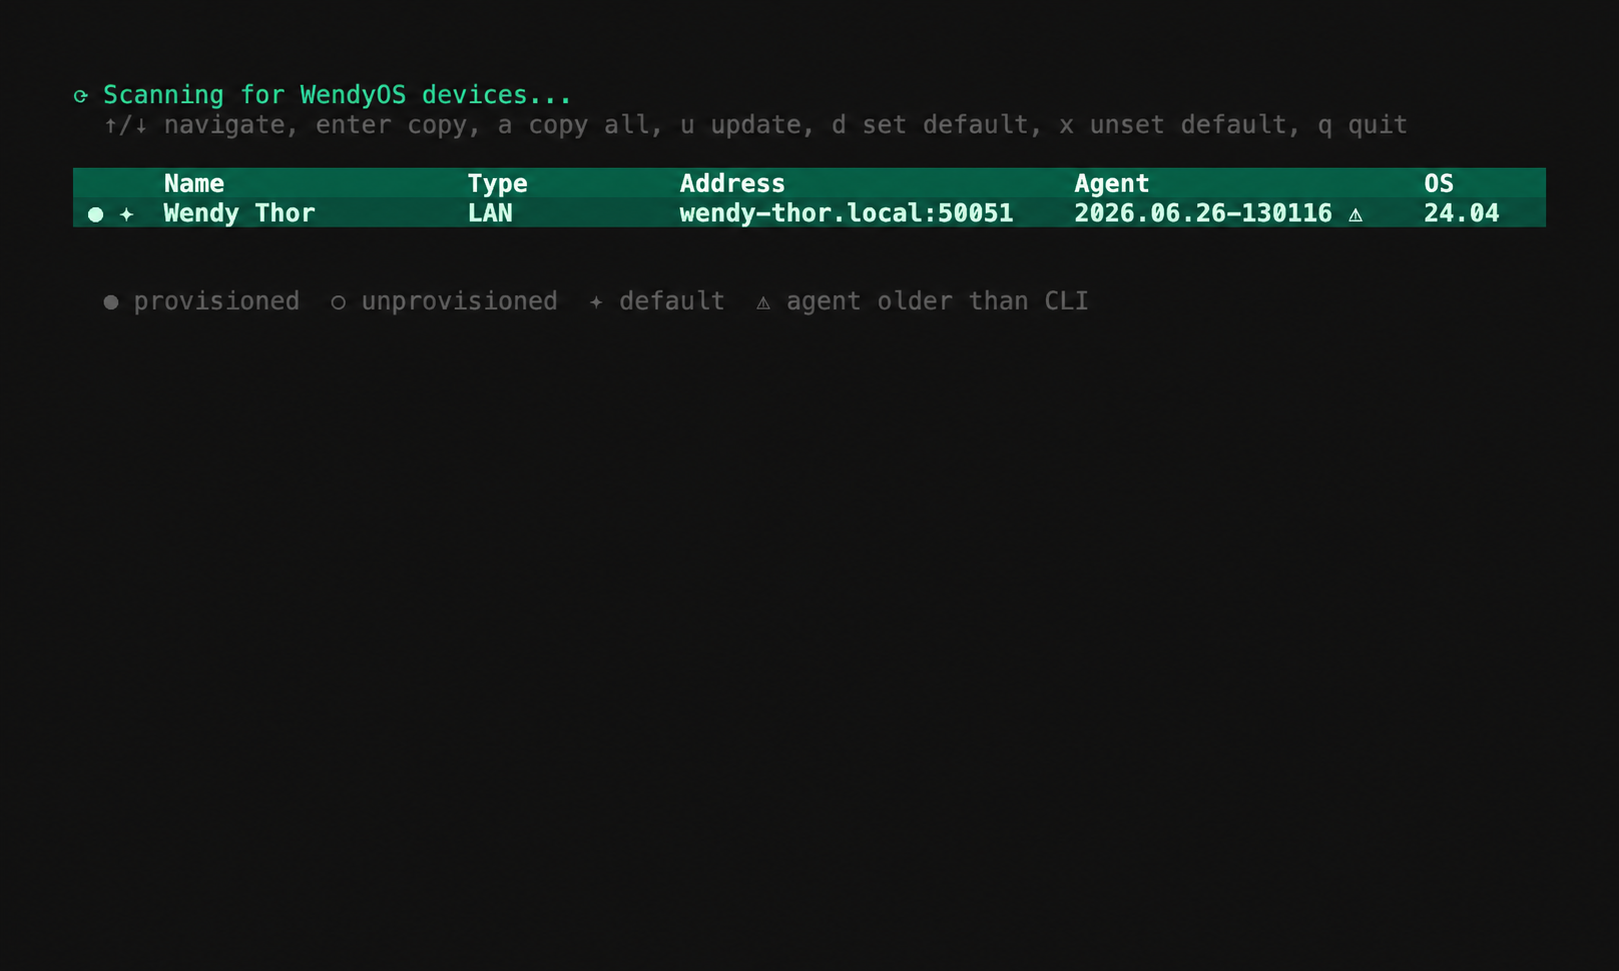
Your Thor is ready for development. See Discovering Devices to learn more.
Next steps
Your Thor is ready. Continue with step 3 of the quickstart to create and run your first app.