Qualcomm Dragonwing IQ8 and IQ9
Install WendyOS on a Dragonwing IQ-8275 or IQ-9075 evaluation kit over USB-C.
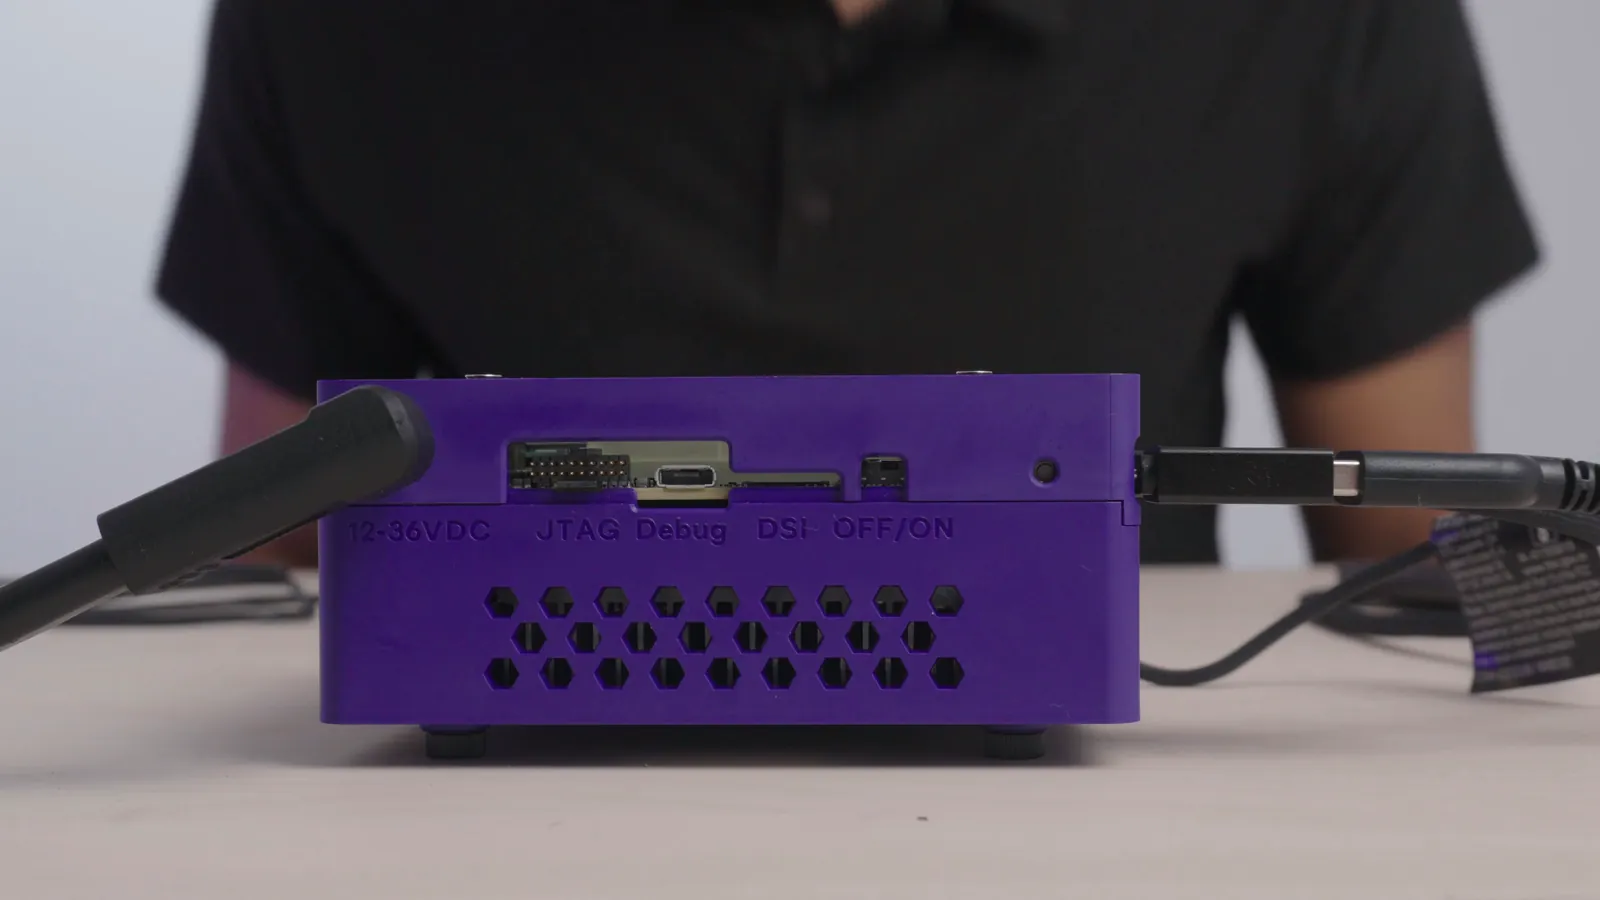
WendyOS installs on the Qualcomm Dragonwing IQ-8275 EVK (IQ8) and IQ-9075 EVK (IQ9) over one USB-C cable. It writes to the board's internal UFS storage, so no external drive is needed. The steps are the same for both boards. The photos show an IQ8.
Installing is a factory reset. Both OS slots, the config partition and /data are rewritten, so device identity, Cloud enrollment, saved Wi-Fi and app data are discarded.
What you need
- A Dragonwing IQ-8275 EVK or IQ-9075 EVK with its power supply
- A USB-C data cable. A charge-only cable does not work.
- For the IQ8 only: a micro-USB cable, used after the install
- Wendy CLI installed on your development machine (install it)
Installation steps
Set the EDL switch
Start with the board powered off. Push SW2-3, the third switch on the four-position SW2 DIP switch, up to ON.
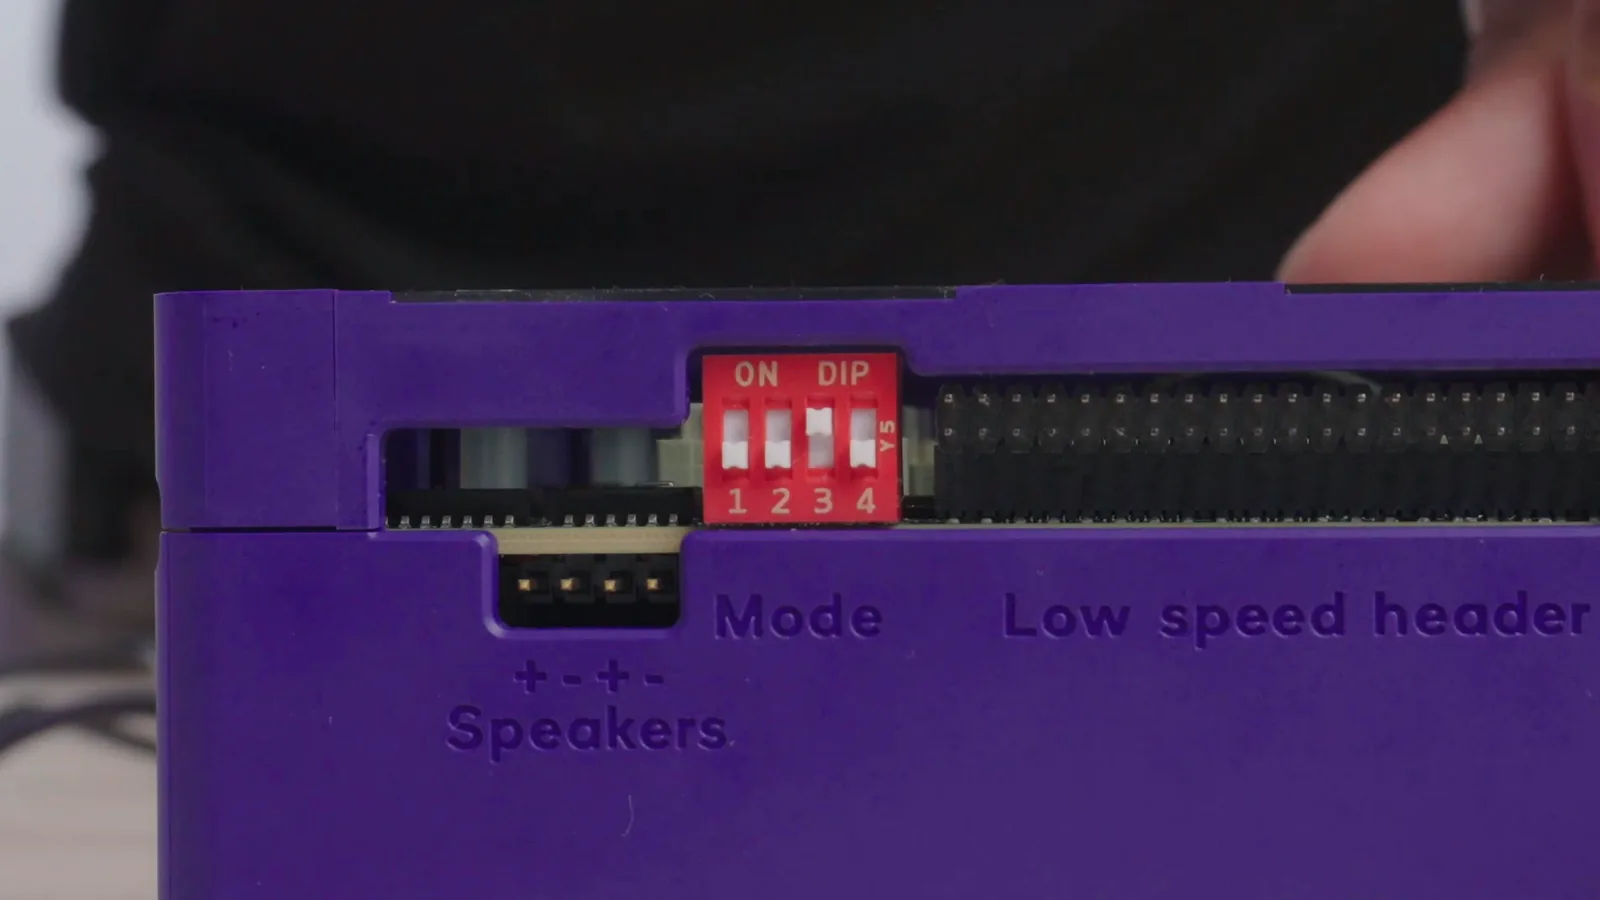
This selects EDL mode, which is how the board accepts a new image over USB. It is a switch, not a button, so it stays set until you move it back.
Board revisions name this switch differently
wendy install prints a switch name before it writes anything: SW2-3 for the IQ9 and S2-8 for the IQ8. Beta kits use S5-4. The IQ8 in these photos uses SW2-3, as Qualcomm's current guides for the IQ-8275 EVK and IQ-9075 EVK do. If the name the installer prints is not on your board, use the EDL switch from Qualcomm's guide for your revision.
Connect USB-C and power on
Connect the USB-C cable from the board's USB0 port to your computer. Connect the power supply, then turn the power switch on.
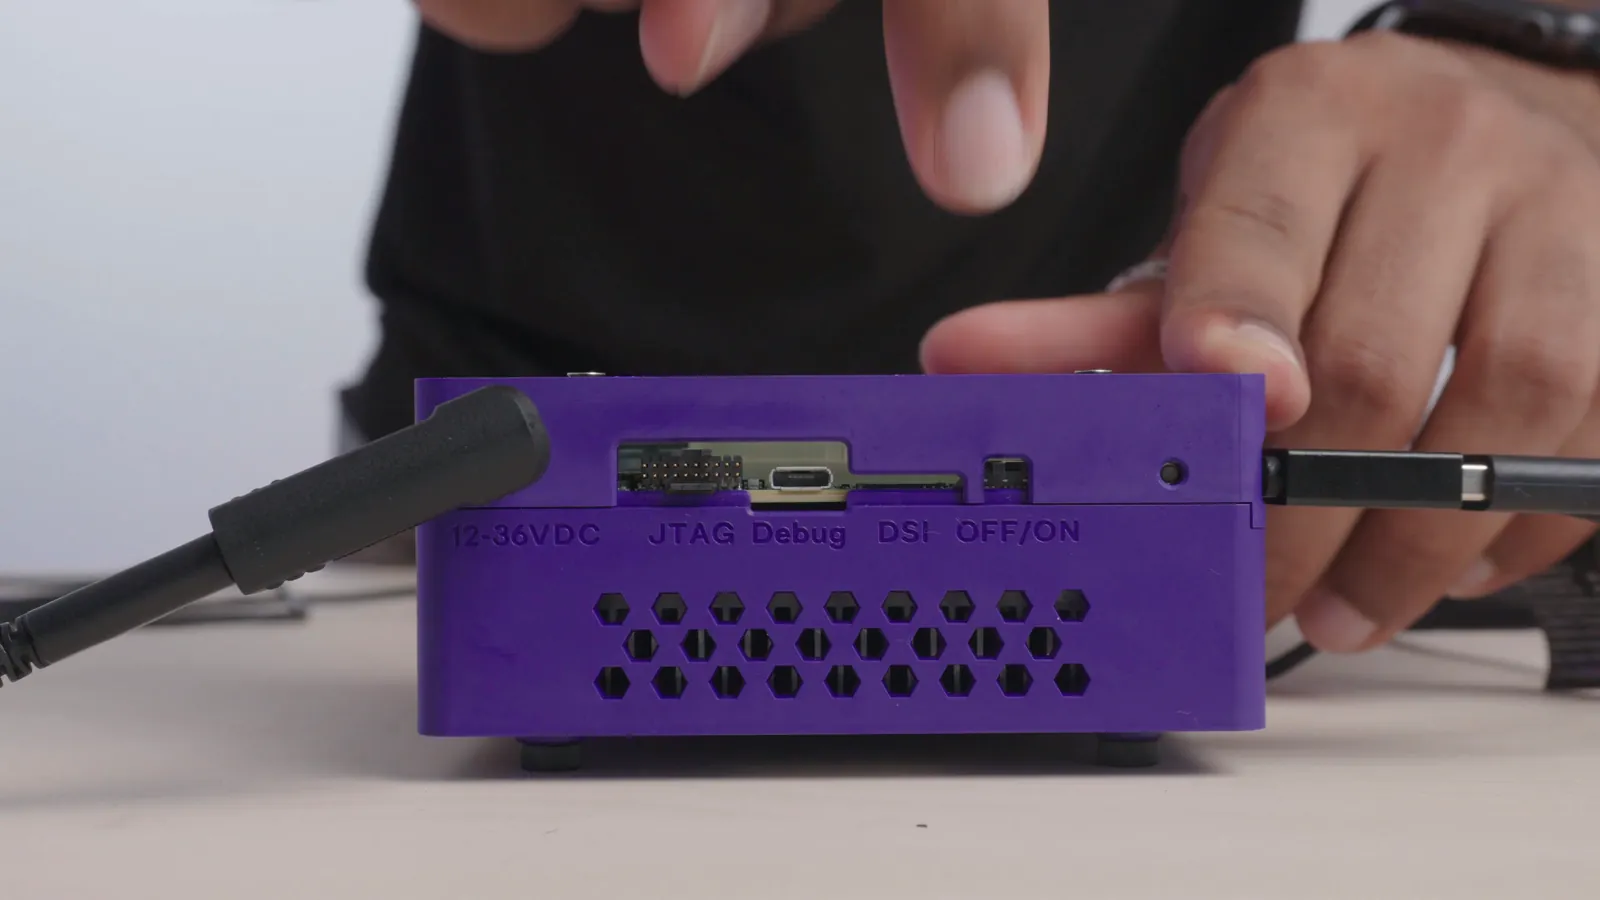
The board boots straight into EDL mode and shows no display output. That is expected.
Run the installer
wendy install --device-type dragonwing-iq-8275wendy install --device-type dragonwing-iq-9075You can also run wendy install with no flags and choose the board from the list.
The installer offers to set up Wi-Fi, a device name and Cloud enrollment. It then shows the cabling and switch steps and asks you to confirm twice: that the board is in EDL mode, and that you want to write to it.
Wendy downloads and verifies the image, then reads the board's chip ID before it writes anything. It refuses to flash if the ID belongs to a different Dragonwing board. The flash takes a few minutes. Keep power and USB connected until it finishes.
If the installer reports that USB access was denied:
- macOS: run the same command with
sudo. - Linux: add the udev rule the installer prints, then replug the cable, or run the same command with
sudo. - Windows: run the command again and accept the administrator prompt. Wendy installs the USB driver binding the board needs.
Set the switch back and power-cycle
When the installer reports success, turn the power off, push SW2-3 back down to OFF, and turn the power on again.
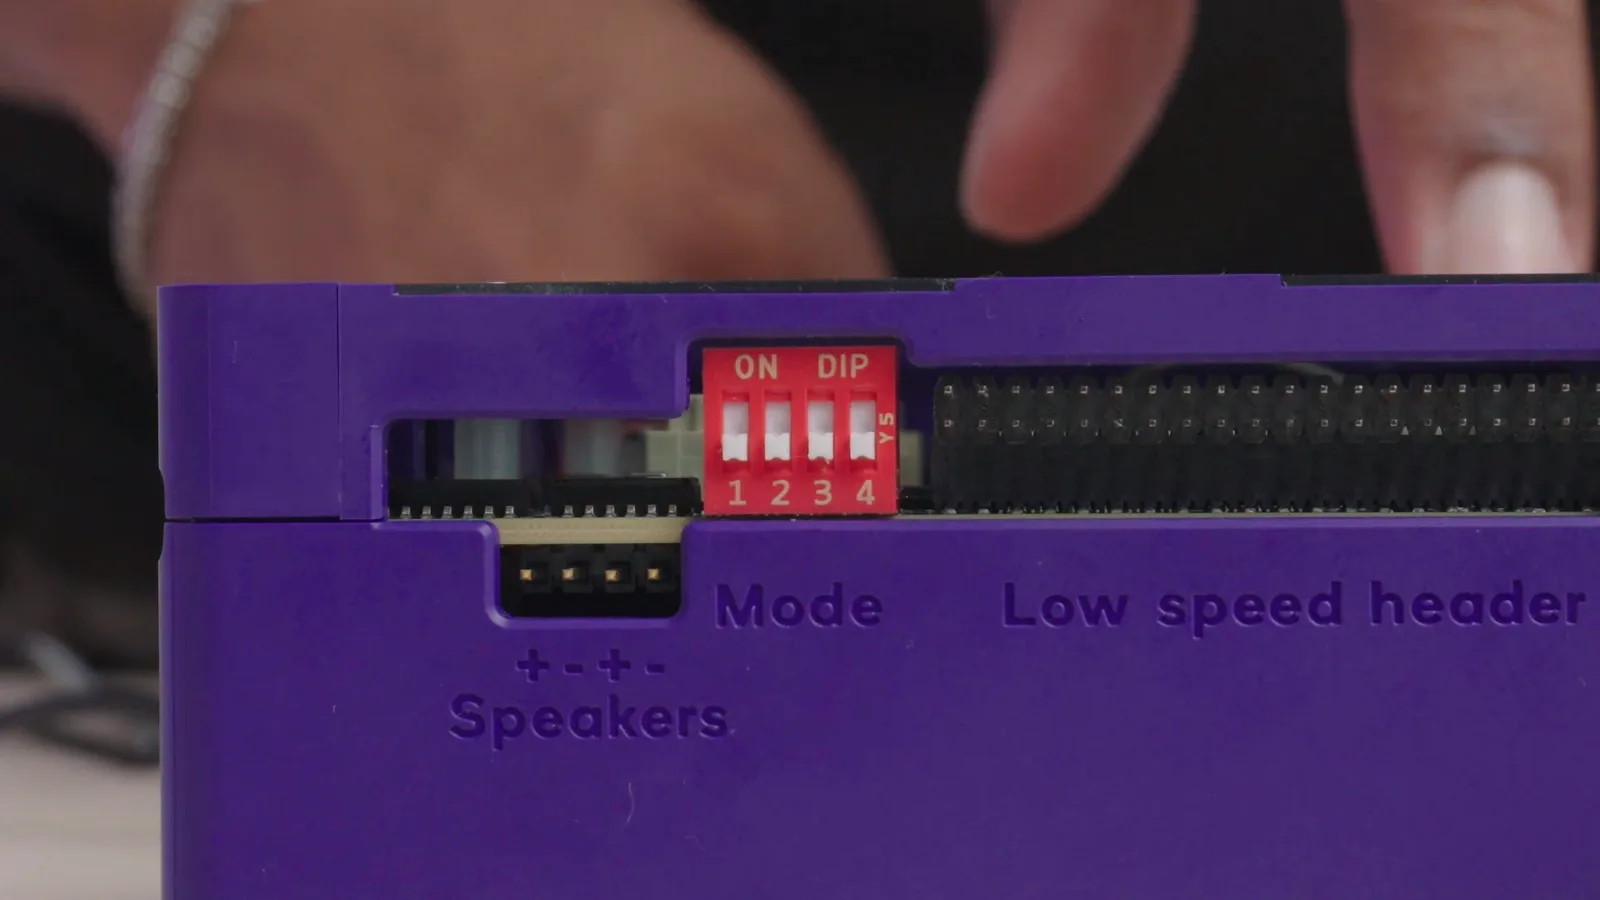
If the switch is left ON, the board boots into EDL mode again instead of WendyOS.
Find your board
Move the cable to your computer from USB0 (USB-C) to USB2 (micro-USB). WendyOS uses USB2 for USB networking and CLI access. USB0 stays the EDL and recovery port.
Leave the USB-C cable in USB0.
Wait for WendyOS to boot, then run:
wendy discoverYour board is ready when it appears in the list. See Discovering devices to learn more.
If the flash does not finish
- Nothing was written. The board is unchanged and still boots what it had. Set SW2-3 back to OFF and power-cycle, or leave it ON and run the command again.
- The flash stopped partway. The board may not boot. Leave SW2-3 ON, power-cycle the board to re-enter EDL mode, and run the same command again.
- More than one board is in EDL mode. Disconnect all but the one you are flashing. Boards in EDL mode share one USB ID, so Wendy cannot tell them apart until it reads the chip ID.
The installer prints the path of the full flash log when it ends.
Next steps
Your board is ready. Continue with the app tutorial to create and run your first app. The wendy install reference lists every flag.